

Imagine the mouthwatering aroma of freshly baked bread wafting through your home, a warm and crusty loaf waiting patiently in your kitchen, just begging to be savored. You might think that creating such a culinary masterpiece requires years of experience or complicated techniques, but with our easy guide on mastering the art of homemade artisan bread using only four simple ingredients, anyone can become an expert baker.
Key Takeaways
- Making homemade artisan bread with only four simple ingredients is easy and affordable, perfect for those interested in off-grid living or sustainability.
- The four key ingredients needed to make perfect homemade artisan bread are flour, water, salt, and yeast. Choosing high-quality ingredients is essential for successful bread making.
- Mixing and kneading the dough is crucial. This recipe uses a folding technique that helps develop gluten without overworking the dough.
- Proper proofing and baking instructions will ensure a soft interior with a light crispy crust. Measuring ingredients accurately and choosing the right flour can also enhance your homemade artisan bread’s flavor profile.
Understanding Artisan Bread
Artisan bread is characterized by its rustic appearance, soft interior, and light crispy crust, and homemade artisan bread offers numerous benefits over commercially produced loaves.
Characteristics Of Artisan Bread
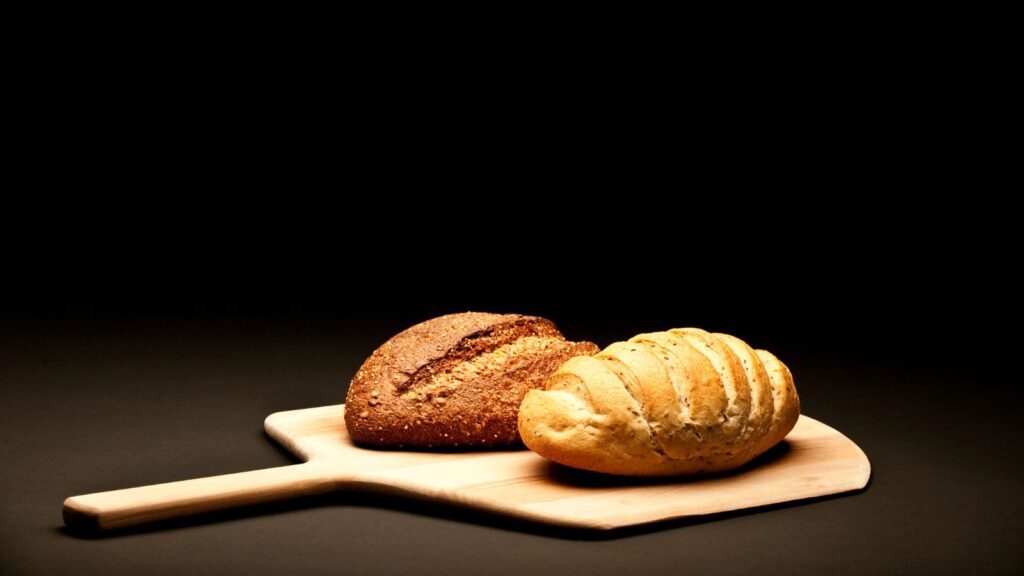
Artisan bread, known for its rustic appearance and delicious taste, often boasts a crispy crust and soft, airy interior. With its emphasis on traditional baking methods and simple ingredients, this type of bread stands out from mass-produced loaves you might find at the grocery store.
One key characteristic of artisanal bread is the use of long fermentation periods which help to develop complex flavors and a delightful chewy texture.
Many people interested in off-grid living appreciate homemade artisan bread not only because it requires minimal resources but also due to the self-sufficiency it fosters.
Owning your craft by mastering this classic recipe allows individuals to simplify their lifestyle while still enjoying all the satisfactions of freshly baked goods straight out of their own oven.
As an added benefit, making your own bread can significantly reduce waste associated with plastic packaging found at most retail locations.
Benefits Of Homemade Artisan Bread
Making homemade artisan bread has numerous benefits, especially for those interested in off-grid living. Perhaps the most obvious benefit is the incredible taste and aroma of freshly baked bread wafting throughout your home.
With only four simple ingredients, you can create a rustic loaf with a light crispy crust and soft interior that is sure to impress family and guests alike! Additionally, homemade artisan bread is much healthier than store-bought options since it typically contains fewer preservatives, additives, or unnecessary sugar.
It’s also an affordable option that allows you to control what you’re putting into your body while minimizing waste by using simple ingredients that are easy to find or even grow yourself if living off-grid.
The Four Key Ingredients For Homemade Artisan Bread
In this section, we will explore the four essential ingredients needed to make perfect homemade artisan bread. From flour to yeast, salt and water, each ingredient plays a crucial role in creating a loaf with a soft interior and crispy crust.
Flour
Flour is one of the essential ingredients needed to make homemade artisan bread. Bread flour is recommended as it has a higher protein content than all-purpose flour, which helps create a chewy texture and sturdy structure for your bread.
An interesting fact about bread flour is that it contains gluten, which helps create the structure in your dough by trapping air bubbles during proofing. This gives your bread its signature texture with a soft interior and light crispy crust.
Water
Water is an essential ingredient in making homemade artisan bread. Not only does it activate the yeast, but it also helps develop the dough’s structure. When combined with flour, salt, and yeast, water initiates a fermentation process that creates gases contributing to the bread’s flavor and texture.
Therefore, using high-quality water is crucial in achieving perfect results.
If you’re living off-grid or in a rural area where access to clean tap water may be limited, consider sourcing your water from natural sources like springs or wells as these are likely to contain fewer impurities than city-supplied water.
Using filtered or distilled water is also an option if you’re unsure about the quality of your tap or well-water supply. Remember that temperature also plays a role in creating ideal conditions for fermentation when mixing dough; use lukewarm (not hot) water to avoid killing the yeast during activation.
Salt
When making homemade artisan bread, one might think that salt is just a seasoning to add flavor. However, salt also plays a crucial role in the overall structure and texture of the bread.
Salt slows down the fermentation process in yeast by drawing out moisture from it, which helps regulate its growth.
Aside from aiding with fermentation, salt also enhances the flavor profile of this four-ingredient bread recipe. It helps balance out the sweetness created by yeast during fermentation while adding its own unique taste to the finished product.
It’s important to note that using table salt instead of kosher or sea salt may affect the final outcome of your homemade bread due to differing crystal sizes and mineral content affecting how much water is absorbed.
Yeast
Yeast is a key ingredient in making homemade artisan bread. It’s a living organism that feeds on sugar and produces carbon dioxide, which helps the dough rise and gives the bread its light, airy texture.
Instant yeast is commonly used for this recipe as it doesn’t require activation before use. When mixed with flour, salt, and water, instant yeast releases sugar and gases that contribute to the bread’s flavor.
It’s important to measure yeast accurately since too little or too much can affect the quality of your bread. Using fresh ingredients such as water will also help activate the yeast properly so that your dough rises correctly without getting dense.
Step-by-Step Guide To Making Homemade Artisan Bread
To make homemade artisan bread, first mix flour, yeast, salt, and water until a sticky dough forms. Then let the dough rest for up to 12 hours before shaping it into a ball and letting it proof for another hour.
Mixing And Kneading Techniques
Mixing and kneading the dough is a crucial step in making homemade artisan bread. The right mixing and kneading techniques will determine how your bread turns out.
Instead of traditional kneading, this recipe uses a technique called folding, which helps develop gluten without overworking the dough. After mixing all four ingredients together, let the dough rest for 30 minutes before beginning to fold it at intervals of 30 minutes for two hours.
This simple yet effective technique creates a soft interior with a light crispy crust that’s perfect for dipping in olive oil or slathering with butter.
Proofing And Baking Instructions
Once the dough has been mixed and kneaded, it’s time to let it rest and rise. This is known as proofing. After proofing, the bread can be baked in a preheated oven. To proof the dough, cover it with a damp cloth or plastic wrap and put it in a warm place for at least an hour.
When you’re ready to bake your artisan bread, preheat your oven to 450°F (230°C). Score the top of the risen dough with a sharp knife or razor blade and sprinkle some flour on top.
Then carefully transfer the dough onto a baking sheet or Dutch oven lined with parchment paper.
One key factor when baking bread is keeping an eye on temperature – if your loaf cooks too fast or too slow this will impact its texture once cooked! Another important point is not over-baking your bread: once done cooking take out immediately from heat source otherwise you may end up with dry crusty loaves- not ideal! With practice comes perfect timing but don’t worry because even imperfect homemade artisanal loaves are delicious enough!
Tips And Tricks For Perfecting Your Homemade Artisan Bread
To take your homemade artisan bread to the next level, try these tips and tricks for choosing the right flour, measuring ingredients accurately, adding variations and enhancements, and properly storing your bread.
Choosing The Right Flour
To make the perfect homemade artisan bread, it is crucial to choose the right flour. Bread flour works best for this recipe because of its high protein content and ability to develop a good gluten structure, giving your bread that characteristic chewy texture.
All-purpose flour may also be used but will result in a lighter crumb and less chewy texture.
When selecting your flour, consider purchasing organic and non-GMO varieties, as they provide higher nutritional value without additives or chemicals. Additionally, buying local from small farmers can ensure fresh ingredients while supporting sustainable agriculture practices.
Measuring Ingredients Accurately
To ensure the perfect loaf, it’s important to measure your ingredients accurately. We recommend weighing your flour rather than measuring by volume as this provides a more consistent result.
Using too much or too little flour can affect the texture and taste of your bread.
Another key ingredient that needs precise measurement is salt – too much can overpower the flavor, while too little can leave your bread tasting bland.
By taking care during this stage of preparation, you’ll notice a significant improvement in the quality of your artisan bread.
Adding Variations And Enhancements
Adding variations and enhancements to your homemade artisan bread can be a fun way to experiment with different flavors and textures. Some popular additions include herbs like rosemary or thyme, diced onions, garlic, cheese, or even nuts and seeds.
One idea is to create a sourdough starter culture by mixing flour and water in a jar and letting it sit for several days until you have a bubbly mixture that smells slightly sour.
This culture can then be added to your bread dough instead of instant yeast for an entirely new flavor profile.
Properly Storing Your Bread
After baking the perfect loaf of homemade artisan bread, it’s important to store it properly for optimal freshness and flavor. The best way to keep your bread fresh is by storing it in a paper bag at room temperature.
Avoid using plastic bags as they can trap moisture, causing the bread to become stale quicker.
To extend its shelf life even further, you could also freeze your homemade artisan bread in an airtight container or freezer bag for up to three months.
With these easy storage tips in mind, you’ll be able to enjoy delicious and freshly baked homemade artisan bread whenever you desire!
Common Mistakes To Avoid When Making Artisan Bread
Avoid over-kneading or under-kneading the dough, as this affects its structure and texture. Ensure that the dough is properly proofed before baking to avoid an uneven rise in the bread.
Pay attention to oven temperatures; too low, and your bread will be dense and undercooked; too high, and it may burn or over-brown quickly.
Over – Or Under-Kneading
Kneading the dough is one of the most crucial steps in bread making. Kneading develops gluten and gives the bread its characteristic chewiness and structure. However, over-kneading can actually be harmful to the dough, as it breaks down the gluten strands and makes the bread tough and dense.
To avoid over- or under-kneading your homemade artisan bread, stick to a consistent method that works for you. A good rule of thumb is to knead until the dough has a smooth surface and feels elastic to touch (usually around 10-12 minutes).
Remember that practice makes perfect when it comes to mastering your homemade artisan bread recipe. Keep experimenting with different techniques until you find what works best for you.
Under- Or Over-Proofing The Dough
Proper proofing of the dough is crucial to achieving a light, airy interior and a crispy crust in your artisan bread. Proofing refers to the process of letting the shaped dough rise before baking.
To avoid under or over-proofing, it’s important to pay attention to visual cues rather than strict timeframes. The dough should roughly double in size during proofing and hold its shape when lightly pressed with a finger.
By mastering proper proofing techniques, you can take your homemade artisan bread from good to great.
Improper Oven Temperature
One of the most common mistakes when making homemade artisan bread is improper oven temperature. If your oven is not hot enough, your bread may come out dense and underbaked.
On the other hand, if it’s too hot, you risk burning the crust before the inside has finished baking. To avoid this mistake, make sure to preheat your oven for at least 30 minutes before baking your bread.
Another tip to get perfect artisan bread every time is to use a Dutch oven or similar vessel with a lid while baking.
Over-Baking The Bread
Over-baking the bread is one of the most common mistakes made by beginner bakers. It can result in dry, tough bread with a burnt crust. To avoid this, it’s important to keep an eye on your loaf throughout the baking process and not rely solely on the timer.
One way to tell if your bread is done without cutting into it is by tapping the bottom of the loaf- if it sounds hollow, then it’s ready! Additionally, using a digital thermometer to check for an internal temperature of 190-200°C can give you peace of mind that your loaf has finished baking.
Remember that oven temperatures can vary, so don’t be afraid to adjust your recipe accordingly and take notes for next time.
Conclusion
Congratulations! You now have the knowledge and skills to make delicious homemade artisan bread with just four simple ingredients. Remember to choose high-quality flour, measure your ingredients accurately, and give your dough proper time to proof and bake at the right temperature.
With this easy step-by-step guide, you can impress friends and family members with your new baking talents.
FAQs:
1. What are the four simple ingredients needed to make artisan bread at home?
The four key ingredients required for making artisan bread at home include flour, water, yeast and salt. These basic elements form the foundation of any great bread recipe, with endless variations possible depending upon desired flavor profiles and techniques used.
2. How long does it typically take to make homemade artisan bread?
While specific times may vary depending on recipe complexity or type of loaf being made, most homemade artisan bread recipes will require a minimum of several hours from preparation to baking in order to achieve optimal results.
3. Can I use alternative flours or gluten-free options when making homemade artisan bread?
Yes – while traditional wheat-based flour is often used in many recipes for its structural properties as well as nutritional qualities such as fiber content & complex carbohydrates that provide energy throughout the day; there are plenty of gluten-free options available now too including coconut flour which can be substituted however it’s important follow guidelines listed on packaging regarding ratios & substitution amounts before attempting any alterations.
4. What equipment do I need to get started making homemade artisan bread?
At minimum you’ll need a large mixing bowl , a wooden spoon or pastry scraper (or even your hands) ,a kitchen scale for measuring out precise weights of dry ingredients like flour and yeast, plus an oven preheated 450 °F with a sturdy baking dish such as cast iron skillet or stone surface that holds heat evenly so loaves rise properly without deflating before they’re done cooking through .
