

Welcome to the wonderful world of homemade cheese-making! Whether you’re an off-grid living enthusiast or simply seeking a new culinary adventure, mastering the art of making your own delicious cheeses is both rewarding and fun.
With easy recipes, key techniques, and essential know-how at your fingertips, you can create anything from creamy ricotta to savory cheddar right in your own kitchen. So put on that apron and let’s dive into this ultimate guide for creating mouth-watering cheese masterpieces that will leave your taste buds craving more.
Key Takeaways
- Making homemade cheese requires understanding the cheese – making process, using essential equipment and quality ingredients, and choosing the right milk and cheese cultures.
- Easy recipes for making six types of popular cheeses including ricotta, mozzarella, cheddar feta, cream cheese, and parmesan have been provided in this article.
- Following a step-by-step process for preparing the milk, adding cheese cultures, coagulating milk to cutting/drain curds before pressing/aging is crucial for creating delicious homemade cheeses.
- Making your own cheeses at home allows you to experiment with different flavors while guaranteeing freshness and sustainability.
Cheese-Making Basics
Understand the cheese-making process, essential equipment and ingredients, and types of milk and cheese cultures to ensure success in making homemade cheese.
Understanding The Cheese-making Process
The cheese-making process, though intricate and varied across different types, is a rewarding undertaking for those interested in off-grid living. At its core, the process involves transforming milk into curds and whey by adding specific cultures or rennet that encourage coagulation and fermentation.
For example, in making cheddar cheese – a staple loved by many – the curd is gently heated after cutting to release more whey and create a firmer texture. The curds are then stacked or “cheddared” before being milled into small pieces which are later pressed into molds.
Essential Equipment And Ingredients
To make homemade cheese, you will need essential equipment and ingredients. Some of the necessary equipment needed for making cheese includes a thermometer, cheesecloth, stainless steel pot or cauldron, colander or slotted spoon, and cheese molds.
It is important to note that using low-quality ingredients can negatively impact the final product’s taste. For instance, using ultra-pasteurized milk may not curd properly as this process heats the milk at high temperatures which results in breaking down essential proteins needed for coagulating milk into curds.
It is also crucial to sanitize all your tools before use to prevent contamination from spoilage bacteria that are likely present on surfaces.
Types Of Milk And Cheese Cultures
To make delicious homemade cheese, it’s important to choose the right type of milk and cheese culture. Cow’s milk is a popular choice for making cheese due to its mild flavor, but goat and sheep’s milk can also be used for specific cheeses like feta and Roquefort.
It’s important to note that the quality of the milk will greatly affect the final taste of your cheese. When it comes to cheese cultures, there are two main types: mesophilic and thermophilic.
Mesophilic cultures work at lower temperatures and are ideal for soft cheeses like brie, while thermophilic cultures thrive at higher temperatures and produce harder cheeses such as cheddar or Parmesan.
Easy Homemade Cheese Recipes
This section will provide recipes for making six types of easy homemade cheese, including ricotta, mozzarella, cheddar, feta, cream cheese, and parmesan.
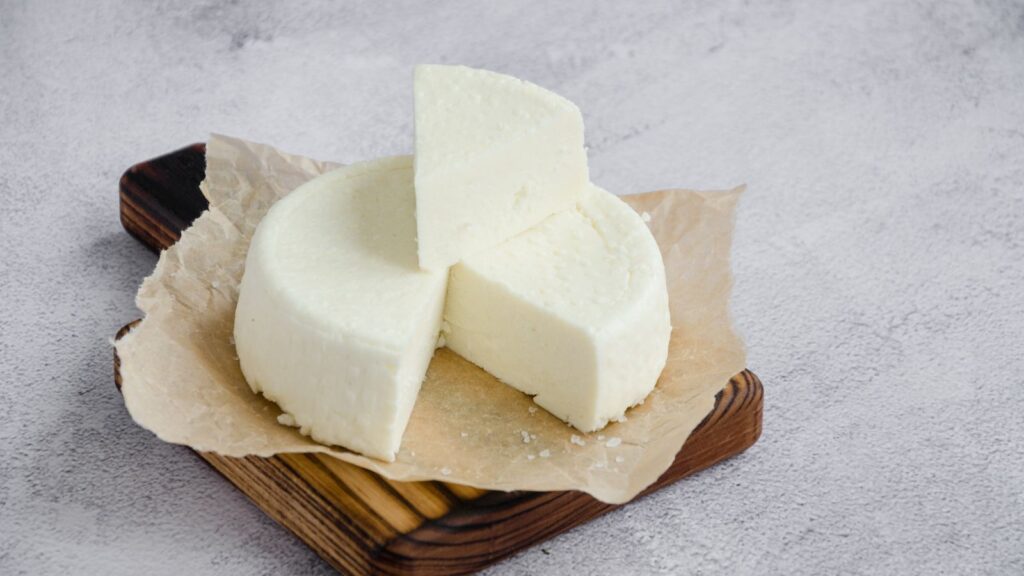
Ricotta Cheese
Ricotta cheese is a simple and versatile cheese that can be made easily at home using just three ingredients: milk, lemon juice, and salt. It’s a perfect addition to pasta dishes or as a spread on toast.
To make ricotta cheese at home, you’ll need to heat the milk in a pot until it reaches 180°F then add lemon juice and let it sit for a few minutes until the curds form.
Using whole milk instead of low-fat milk will result in creamier ricotta cheese with richer flavor. You can also experiment with adding different herbs or spices during seasoning to create unique flavors.
Homemade ricotta cheese can last up to five days if stored properly in an airtight container in the fridge.
Mozzarella Cheese
Mozzarella cheese is a popular type of Italian cheese, often used in dishes like pizza and Caprese salad. It’s known for its unique texture and ability to melt beautifully.
Making homemade mozzarella cheese is surprisingly easy with the right techniques. Firstly, it’s important to use high-quality milk, as this will greatly impact the flavor of your end result.
You’ll need rennet and citric acid to help coagulate the milk, along with a thermometer to monitor temperature levels closely during each step of the process. After allowing the curds to form, you’ll drain off any whey before stretching and shaping your mozzarella by hand.
Cheddar Cheese
Cheddar cheese is a popular cheese that can be easily made at home. This hard cheese requires different techniques to make and has a caramelized and nutty flavor when aged.
The longer the cheddar is aged, the more intense its flavor becomes. It is perfect for making grilled cheese sandwiches or adding to your favorite dish for added depth of flavor.
To make cheddar cheese at home, you will need high-quality milk, rennet, and starter culture.
Feta Cheese
Feta cheese is a tangy and salty cheese that is perfect for adding to salads, sandwiches, and wraps. It’s easiest to make feta cheese with goat milk, but cow milk can be used as well.
To start making feta at home, heat the milk in a pot until it reaches 86°F and then add a mesophilic starter culture.
Next, cut the curd into small cubes and let them sit for 15 minutes before draining off the whey. Salt is sprinkled over the surface of each cube before placing them in molds to press overnight outside of direct sunlight.
Homemade Feta Cheese has a unique flavor compared to store-bought ones because you can control how much salt goes into it which also adds some preservability like curing agents would do if going down this path rather than brining your finished Feta blocks.
Cream Cheese
Cream cheese is a popular type of fresh cheese that can be easily made at home. It has a smooth and creamy texture and mild flavor, making it perfect for spreads, dips, and cheesecakes.
To make cream cheese, you will need whole milk, heavy cream, lemon juice or vinegar as an acidifier, and salt. These ingredients are heated together until they reach a specific temperature before adding the acid to coagulate the milk proteins.
One advantage of making homemade cream cheese is its versatility in adapting flavors such as garlic herb or black pepper by blending in different herbs/spices during processing.
Making your own snacks like this can save money on groceries over time while giving you full control of what goes into your food from farm to table.
Parmesan Cheese
Parmesan cheese is a hard Italian cheese that has a distinct nutty and fruity flavor when aged for at least two years. It is an excellent ingredient in many recipes, ranging from pasta dishes to soups and stews.
The process of making Parmesan cheese involves using unpasteurized milk, starter cultures, rennet, and salt. Once the curd is formed, it is cut into small pieces and heated before being molded into its characteristic shape.
For off-grid living enthusiasts who are interested in making their own Parmesan cheese at home, it’s important to note that this type of cheese requires specific temperature and humidity control during aging.
It also requires significant time and effort but yields satisfying results once done correctly.
Step-by-Step Cheese Making Process
Follow this step-by-step cheese making process to create your own delicious homemade cheese – from preparing the milk, adding cheese cultures, and coagulating the milk to cutting and draining the curd, pressing and aging the cheese.
Preparing The Milk
Before making cheese, it’s important to first choose the type of milk you will use. While cow’s milk is most commonly used, sheep or goat milk can also be used for different flavor profiles.
Once you have chosen your desired type of milk, the first step in preparing it for cheesemaking involves pasteurization or heating the milk to kill any harmful bacteria. You can do this by heating the milk in a pot on low heat while stirring constantly until it reaches a temperature of 161°F (71°C) for at least 15 seconds before cooling down rapidly.
Adding Cheese Cultures
To create delicious homemade cheese, it’s essential to add cheese cultures to the milk. Cheese cultures contain friendly bacteria that help produce lactic acid, which aids in the curdling of milk and adds flavor to the final product.
There are various types of cheese cultures available, including traditional mesophilic (cultured at moderate temperatures) and thermophilic (cultured at higher temperatures) varieties.
It’s important to note that not all milk contains enough natural bacteria to make good quality cheese; therefore, using standardized commercial buttermilk or yogurt as a starter culture could be necessary.
The type of culture used will depend on what kind of cheese you’re making and how tangy and acidic you want your finished product to taste.
Coagulating The Milk
Coagulating the milk is a crucial step in the cheese-making process. It involves adding rennet or an acid to the milk, which causes it to separate into solid curds and liquid whey.
The type of coagulant used depends on the desired end result, with rennet producing firmer curds for hard cheese like cheddar, while acidic coagulation works well for soft cheeses like ricotta.
It’s important to maintain a consistent temperature throughout this process, as even small changes can affect the quality of your cheese. Once you have achieved a clean break between curd and whey, you can begin cutting and draining the curd before pressing and aging your homemade cheese.
Cutting And Draining The Curd
After the milk has been coagulated, it is time to cut and drain the curd. Cutting the curd helps to release excess whey and create a more solid texture for your cheese. The size of the curds you cut will depend on the type of cheese you are making.
Once the curd has been cut, it needs to be drained in cheesecloth or a draining bag. This helps remove any remaining whey and allows the cheese to take shape. It’s important to remember not to rush this process as proper drainage is crucial for creating a good-quality cheese.
Pressing And Aging The Cheese
After draining the curd, cheese needs to be pressed to remove excess whey and create a solid texture. This can be done using weights or presses made especially for cheesemaking.
Once pressed, the cheese needs to be aged in order to develop its flavor and texture. Aging allows bacteria and enzymes in the cheese to break down proteins and fats, resulting in complex flavors.
Cheese can be aged at different temperatures and humidities depending on the desired final product – soft cheeses like brie are typically aged at warmer temperatures with higher humidity levels while hard cheeses like parmesan require cool, dry environments.
Tips And Techniques For Perfecting Homemade Cheese
Control the temperature and humidity during the cheese-making process, add salt and seasoning to enhance flavor, experiment with different types of milk for unique taste, age your homemade cheese for added depth of flavor, and store it properly.
Temperature And Humidity Control
Controlling temperature and humidity is crucial in making homemade cheese. Cheese cultures and enzymes require specific temperatures to work their magic, so it’s important to closely monitor the temperature during the coagulation process.
A cheese thermometer can help you achieve accuracy here. Humidity is also a critical factor because too much or too little moisture can harm your cheese production. For instance, overly dry air could cause your cheese to crack while an excessively humid environment may encourage mold growth on your cheese wheels.
One helpful tip for controlling the temperature in off-grid settings is to use thermometers designed for this purpose like probe thermometers which often have alarms that go off when there are significant changes in either direction; therefore, allowing adjustments before things get out of hand.
Salt And Seasoning
Salt and seasoning are crucial components in cheese making as they affect the flavor, texture, and shelf life of the final product. Salt helps to preserve the cheese by inhibiting bacteria growth while also enhancing its taste.
The amount of salt used depends on personal preference and the type of cheese being made.
In addition to salt, other seasonings such as herbs, spices, or even fruits can be added to enhance the flavor profile of homemade cheese. Adding fresh garlic or chives to cream cheese creates a savory spread perfect for bagels or crackers.
Fruits like cranberries can be added to goat cheese for a sweet and tangy flavor combination that pairs well with salads or charcuterie boards.
Adding Flavor And Texture
When it comes to cheese-making, adding flavor and texture is an important step in creating delicious homemade cheese. There are various ways to add flavor and texture to your cheese, including using herbs, spices, or fruits like cranberries or apricots.
In addition to adding flavor, you can also vary the texture of your cheese by adjusting the draining time during the curd process. For example, a longer draining time will result in a drier and crumbly texture while a shorter draining time will result in a creamier texture.
It is important to note that proper aging techniques play a crucial role in developing rich flavors and unique textures in homemade cheeses. By controlling temperature and humidity during the aging process, you can create complex layers of flavors- from nutty notes for aged cheddar cheeses to earthy undertones for Camembert-style soft cheeses.
Using Different Types Of Milk
Different types of milk can affect the flavor, texture, and consistency of your homemade cheese. Cow’s milk is the most commonly used type of milk and produces versatile cheeses like cheddar and mozzarella.
However, other types of milk such as goat’s milk or sheep’s milk can be used to make unique cheeses with a distinct taste.
It is important to note that the fat content in different types of milk affects the outcome of your cheese. For example, whole-fat dairy products like cream produce rich and creamy cheeses such as cream cheese while low-fat dairy products result in drier cheeses with less pronounced flavors.
Aging And Storing Your Cheese
Once you’ve made your homemade cheese, the next step is to age and store it properly. The aging process gives cheese its characteristic flavor and texture, so it’s important to get it right.
Different cheeses require different aging techniques – some are aged for just a few days, while others can be aged for months or even years.
When storing cheese, make sure to wrap it in waxed paper or cheesecloth rather than plastic wrap. This allows air to circulate around the cheese while protecting it from drying out or absorbing other flavors.
Some cheeses like cheddar can also be waxed after they have been aged enough; this seals the rind and helps maintain moisture levels during long-term storage.
Troubleshooting Common Cheese Making Issues And Pro Tips
Discover pro tips for avoiding common cheese-making mistakes like setting issues, too much acidity or salt, and cheese not melting properly. Learn how to troubleshoot these issues with easy-to-follow steps to achieve perfect homemade cheese every time.
Cheese Not Setting
Sometimes, cheese doesn’t set as it should during the cheese-making process. This could be due to a variety of factors such as not using enough rennet or not allowing enough time for the curd to form properly.
Another common reason for cheese not setting is incorrect temperatures. It’s important to keep a consistent temperature throughout the cheesemaking process to allow for proper coagulation of the milk.
If your temperature is too low, try increasing it slightly and giving it some extra time to set properly.
Remember that making homemade cheese takes practice and patience! Don’t be afraid to experiment with different techniques until you find what works best for you.
Cheese Too Salty Or Acidic
One common issue that can arise when making homemade cheese is ending up with a product that is too salty or acidic. This can be caused by using too much salt during the cheese-making process or not using enough rennet to properly coagulate the milk.
To avoid this problem, it’s important to measure ingredients carefully and follow the recipe closely. If you do end up with a batch of overly salty or acidic cheese, you can try soaking it in cold water for 30 minutes to an hour to help remove excess saltiness.
Alternatively, adding cream or milk can help balance out acidity levels and improve the taste of your cheese.
Cheese Not Melting Properly
If you’re having trouble getting your homemade cheese to melt properly, there could be a few things going wrong. First and foremost, it’s important to note that not all cheeses are created equal when it comes to melting.
For example, mozzarella and cheddar tend to melt well because they have a lower acidity level than other types of cheese.
However, if you’re using the right type of cheese and still encountering issues with melting, it’s possible that the curds weren’t heated enough during the cheesemaking process or weren’t cut small enough before being pressed into blocks or rounds.
To ensure proper melting in your recipes, experiment with different types of cheese and try adjusting cooking times and temperatures until you achieve the desired result.
Pro Tips For Success
To ensure success in making homemade cheese, it is important to pay attention to temperature and humidity control. These factors can significantly impact the texture, flavor, and overall quality of your cheese.
For instance, if the environment is too humid or hot during the aging process, mold may develop on the surface of your cheese.
Another pro tip for success in cheesemaking is to use high-quality ingredients such as fresh milk and culture starters. The type of milk you choose will also affect the taste and texture of your final product.
Using raw milk instead of pasteurized milk can result in a more complex flavor profile while using goat’s milk will yield a tangier taste.
By paying attention to these tips and techniques for perfecting homemade cheese-making outlined above coupled with a bit of patience when experimenting with different types you’ll be able to delight any heart that has an interest in off-grid living as they enjoy delicious results every time they make their own specialty cheeses at home from scratch!
Conclusion
In conclusion, mastering the art of homemade cheese can be a fun and rewarding experience. With the right ingredients, equipment, and techniques, anyone can make delicious cheeses at home.
Whether you’re a beginner or an experienced cheesemaker, this article has provided easy recipes and step-by-step instructions to help you produce mouth-watering results. From soft ricotta cheese to aged cheddar, there’s no limit to what you can create in your own kitchen.
FAQs:
1. What are some basic supplies needed to make homemade cheese?
To get started making homemade cheese, you’ll need a few key supplies including cheesecloth, a thermometer for monitoring temperature, rennet or an acid such as vinegar or lemon juice to curdle the milk and a pot for heating and stirring the milk.
2. Can I use any type of milk to make cheese at home?
While cow’s milk is most commonly used in homemade cheese recipes, you can also experiment with using goat’s milk or sheep’s milk depending on your personal preferences and what’s available in your area.
3. How long does it take to make homemade cheese?
The length of time needed to make homemade cheese can vary depending on the recipe being used and factors such as room temperature and humidity levels. Some types of cheeses can be made in as little as 30 minutes while others may require several hours or even days of aging before they’re ready to eat.
4. Do I need special equipment to age my homemade cheeses?
If you plan on aging your homemade cheeses, there are a few pieces of equipment that can be helpful including wax paper or cheesecloth for wrapping the finished product, specialized containers designed for storing cheeses during aging like ceramic crocks or plastic boxes with drainage holes, and a refrigerator set at the proper temperature range (typically between 35-55°F) for optimal storage conditions.
